Behind the Scenes: The Art of Creation
Watch how raw wood logs transform into functional art. From cutting slabs to the final polish, this is the hard work behind the shine.
Every project starts with the right wood. Here, my team and I are at the lumber yard, cutting massive logs into slabs that will soon be transformed into beautiful river tables.
Preparing the wood is a critical first step. This video shows the careful process of cutting and smoothing a raw wood slab to get it ready for the resin pour.
Sanding the raw wood is essential for a smooth foundation. I use a power sander to level the surface and bring out the natural beauty of the wood grain before any resin is applied.
Teamwork makes the dream work. Here, my students and I are building a large mold for a massive resin table, a crucial step to ensure a perfect cast.
Pouring resin for a large table requires a lot of material. This video shows me mixing a huge batch of epoxy before pouring it into the wood and resin dining table mold.
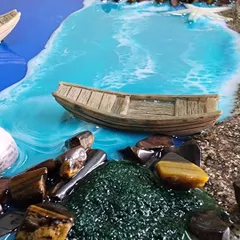
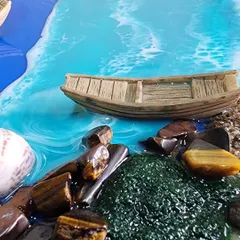
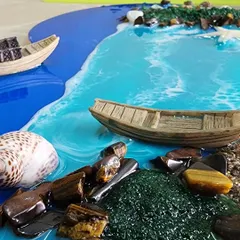
Using a blowtorch is the best way to remove air bubbles that rise to the surface after pouring resin. This ensures a crystal-clear, flawless finish on this ocean table.
The demolding process can be tough but satisfying. Here, a student is carefully chiseling away the mold from a stone-casted resin piece to reveal the art inside.
The sanding process requires patience and precision. Here, several of us are working together to sand a large ocean tabletop, gradually making it smoother and smoother.
This video shows the complete finishing process. After sanding with progressively finer grits, I apply a polishing compound and use a buffing machine to achieve a mirror-like shine.
The final buffing is my favorite part of the process. This is where the piece truly comes to life, and all the hours of hard work pay off with an incredible, glossy finish.
About The Art of Creation: Behind the Scenes
A piece is not just poured and left to dry. Every table undergoes a rigorous process of leveling, air bubble removal with a blowtorch, and progressive sanding from coarse to fine grits. When you look at the final mirror finish, remember that it is the result of hours spent buffing by hand to ensure the wood grain and resin clarity pop exactly right.
Creating resin art is about patience and precision. People often ask about the final look, but the real story is in the workshop, where the transformation happens.
The Process
-
Wood Selection & Prep: Everything starts at the lumber yard. I select seasoned Acacia or Teak slabs. We cut, strip the bark, and sand the raw wood. If the surface isn't level, the resin won't flow right, so this is where we spend the most time.
-
The Pour: This is where it gets technical. We mix the epoxy resin to the exact ratio. Whether it is a deep pour for a river table or a thin layer for a clock, the resin must be bubble-free. We use a blowtorch to remove trapped air, a crucial step for that crystal-clear finish.
-
Curing: The piece rests for days. It cannot be rushed. Proper curing ensures the material is durable and won't yellow over time.
-
The Final Shine: Once cured, the demolding happens. We then move to the sander, moving through different grits to make the surface flawless. Finally, we buff it until the wood and resin have that deep, mirror-like glow.
Frequently Asked Questions
- Why does it take weeks to make a table? The process is layer-based. Each layer needs time to cure, and the sanding and polishing stages are labor-intensive to avoid scratches.
- Can I suggest the wood type? Absolutely. I prefer working with seasoned Acacia or Walnut, but if you have a specific vision, we can discuss the material.
- Is resin art durable? When processed with high-quality, UV-resistant resin and finished correctly, these pieces are designed for daily use and longevity.
Similar work from other experts
Browse through Curated picks from other experts on mytribe
Behind the Scenes: How I Create My Resin Art
Behind the Scenes: How We Create Your Resin Keepsakes
Behind the design: How we craft handmade terrazzo art
Behind the Scenes: How We Craft Your Furniture
The Making Of Your Resin Keepsakes
The Artist's Process: How I Create Resin Wall Clocks
More from Custom Resin Furniture & Art Pieces by Mehul Arts
More services by Mehul Arts