My Mehandi Artistry: Techniques and Details
Get an up-close look at how I layer my designs. From the initial outline to the final 3D shading, this is how I bring your mehandi to life.
Watch how I create a bold mandala. I start with the outline and then fill in the details, using different pressures on the cone to create thick and thin lines.
This video shows the process of creating a detailed Arabic-style design. The flowing patterns and floral motifs are my specialty.
A close-up of me working on the finger details. Every part of the mehandi, no matter how small, is important for the final look.
Creating a beautiful wrist cuff with a lotus motif. The dot work and fine lines add a delicate touch to the design.
This video shows how I create a scalloped border with swirling patterns. It's a beautiful way to finish a wrist or arm band.
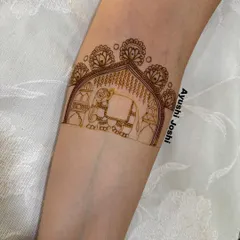
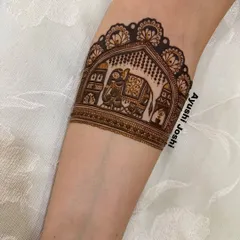
Building a design element by element. Here, I am creating a small, architectural 'jharokha' or window on the wrist.
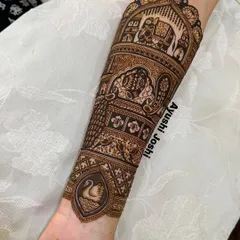
A glimpse of me working on a client's arm. You can see the full design taking shape, with a small elephant motif as a cute detail.
Creating a 3D floral cuff on the wrist. I use layering and shading techniques to make the flowers and leaves look like they are popping off the skin.
The text says "Raftaar pakadni baaki hai" (Still need to pick up the pace). A fun behind the scenes look at my work. The design is a beautiful floral piece.
A simple yet meaningful design of two interlocking rings in a mandala, perfect for an engagement or anniversary.
About The Art in Process
I don't just apply mehandi; I use a specific method to ensure the colour comes out rich and dark. My natural henna paste is mixed with essential oils like eucalyptus or Nilgiri, and I always finish with a traditional lemon-sugar sealant spray. This technique isn't just about making the design look good on the day of your event, but about giving the henna enough time to release its natural dye for that deep maroon stain you actually want.
When you look closely at my work, you will see it is about controlling the flow of the cone. Whether I am drawing a delicate jharokha (window motif) on a wrist or building a 3D floral cuff, I rely on steady hand pressure to vary the thickness of my lines. This is how I create depth.
I focus on three key stages for every design:
- The Architecture: I map out the main motifs first. If it is a mandala, I anchor it in the centre. If it is an Arabic trail, I follow the natural flow of your hand.
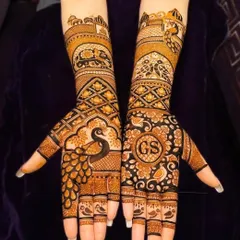
- The Shading: This is where the 3D effect happens. I use negative space and fine cross-hatching to make elements like peacocks or lotuses pop off the skin.
- The Detailing: This is the 'finish'. I fill in the gaps with fine lines and dots, which gives the design that heavy, rich look without needing to over-apply the paste.
My approach is flexible because your design should match your vibe. If you see a specific style in these videos—like my temple-architecture inspired arm bands or those clean, minimalist mandalas—I can replicate it or customize it to fit your preference. I only use fresh, chemical-free cones, so even if you have sensitive skin, you don't need to worry about irritation. If you have a specific pattern from Pinterest or a personal story you want to hide in the henna, show me. I love a challenge and am happy to adjust my process to make it yours.
Similar work from other experts
Browse through Curated picks from other experts on mytribe
Behind the Scenes: The Art of Professional Bridal Mehandi
The Artistic Process: From Sketch to Stain
Behind the Scenes: The Art of Professional Mehendi Design
Behind the Scenes of Detailed Mehandi Art
The Art of Detail: My Mehndi Process
Behind the Scenes: My Mehndi Design Process
More from Festival & Party Mehandi by Atul Nayak
More services by Atul Nayak