The Artistic Process: From Sketch to Stain
Get a closer look at how I build a bridal design from scratch, focusing on fine lines, precise shading, and fresh organic henna.
A satisfying video that shows a full bridal mehendi coming to life, from the first lines on the arm to the final look with a happy bride.
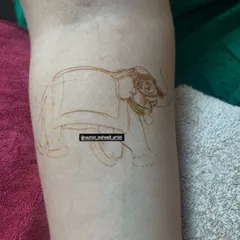
The very first step. This is the initial outline of a royal elephant, drawn freehand with my organic henna cone before any shading or filling is added.
The elephant motif after the first layer of detail and shading has been added. You can see the design starting to take shape.
The fully completed armband, showing the majestic elephant, intricate paisleys, and a graceful swan, all brought to life with detailed henna work.
A startup idea for a bridal armband, featuring royal palaces, peacocks, and elephants. This shows the basic structure before filling.
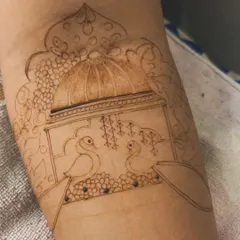
Another design idea for an armband, this one focusing on two peacocks within a palace window, showcasing symmetry and grace.
A work in progress. This shot captures the process of filling in the details of a traditional armband featuring peacocks and ceremonial pots.
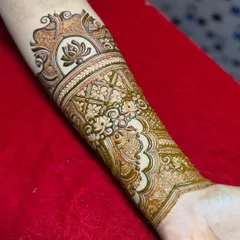
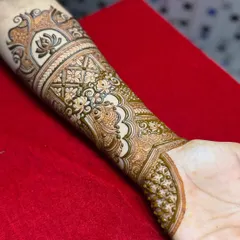
A close-up of a completed armband, showing the fine details of the royal elephant and the surrounding patterns.
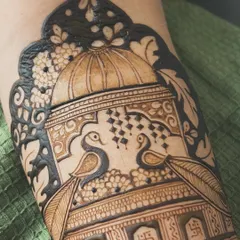
A detailed shot of an armband featuring two peacocks in a royal 'jharokha' or window, a popular element in my designs.
A close-up of a completed armband featuring peacocks, elephants, and a dhol-shehnai motif, showcasing the clean, bold lines.
About The Artistic Process
I don't just put henna on skin, I build the design layer by layer. My process always starts with fresh, organic henna paste that I mix 24 to 48 hours before your booking. This timing is critical. Fresh paste has the smooth flow required to draw architectural details like palace windows, peacocks, and fine grids without the line breaking. When I start with that first freehand outline, everything else follows from the stability of that foundation.
Building Your Mehendi
Every design you see here follows a specific rhythm. It’s not just about drawing, it’s about structure and patience.
The Foundation: Freehand Outlining I never use stencils or transfers. I start with the main structure—the palace arches, the central motif, or the placement of birds. By defining these boundaries first, I ensure the design stays symmetrical as it moves up your arm. This is where I decide the density of the pattern, keeping in mind how the design will look when you bring your hands together for that final photo.
The Art of Filling Once the outlines are set, the real work begins. This is where I use shading techniques to create depth. For traditional motifs like elephants and peacocks, I use dense patterns to make the figures pop against the negative space. If you choose a figure-free design, I focus on building intricate floral vines and geometric grids that wrap around the arm, ensuring the pattern feels continuous from your palm to your elbow.
The Final Stain My job isn't done until the henna is dry. I use lemon-sugar sealant to keep the paste on the skin for as long as possible. The deep, dark maroon stain you see in my gallery is the result of using my own organic henna and giving it the time it needs to oxidize. When you book me, you’re not just paying for the design; you’re paying for the entire process, including the aftercare advice I give you to ensure that stain comes out exactly how we both want it.
Similar work from other experts
Browse through Curated picks from other experts on mytribe
The Art & The Artist: Behind My Mehendi Process
Behind the Scenes: How I Create Intricate Mehendi
The Art in Progress: Behind the Scenes of My Mehndi
Behind the Scenes of Custom Mehendi Artistry
Behind the Scenes: My Mehendi Process and Art Sketches
Behind the Scenes: My Mehendi Process
More from Bridal Mehendi by Ayushi Joshi
More services by Ayushi Joshi