Behind the Scenes: My Mehendi Process and Art Sketches
Before the cone touches your skin, a lot of thought goes into every curve. See how I sketch out designs, practice new patterns, and keep my craft sharp.
A helpful tip for beginners on how to apply mehendi to the fingertips neatly, especially around long nails, without making a mess.
An important aftercare tip for a long-lasting stain. Taking steam from heated cloves helps darken the henna color naturally.
A little tutorial on how I create balance in my designs. I explain how to mix bold, dark flowers with lighter, shaded ones to create depth and visual interest.
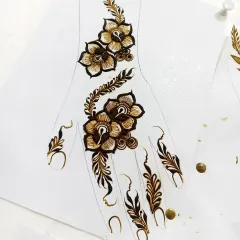
Practicing a new design on paper. This piece combines bold roses with delicate swirls and geometric fillers.
Sketching out a beautiful floral vine design. This Arabic-style bel is perfect for a simple yet elegant look.
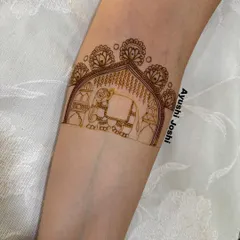
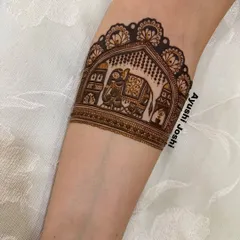
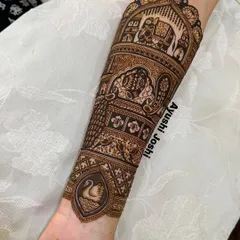
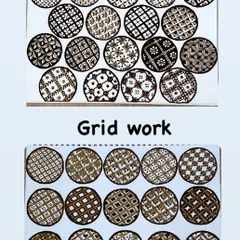
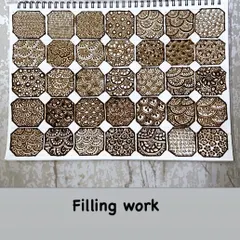
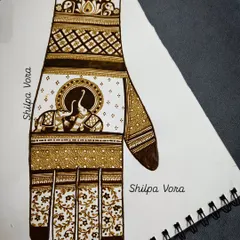
Working on a traditional Indian design on paper. I'm filling in the fine details of the pattern, which requires a very steady hand.
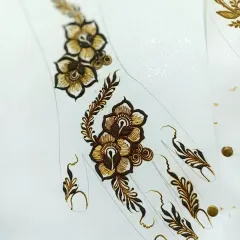
Practicing a floral finger and hand design. Sketching helps me perfect the flow and placement of each element before applying it to a client.
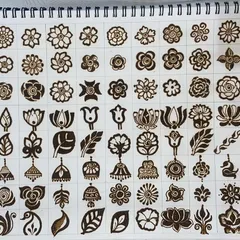
A collection of floral bunches I've sketched. These smaller, self-contained designs are perfect for semi-bridal looks or for guests.
A quick tutorial on how to draw a tiered jhumka (earring) motif. You can create two, three, or more tiers for a more dramatic look.
Some of the work from my online advanced mehendi class. I love teaching others and sharing my passion for this art form.
About My Process & Art Sketches
I do not just pick up a cone and start. Whether it is balancing floral bunches with negative space or planning the flow of a bridal piece, everything starts on paper. This practice helps me ensure that when I am actually working on your hands, the design is perfectly proportioned and, more importantly, the henna application is clean and comfortable for you.
Planning the Perfect Design
Most of my best work starts on a sketchbook. Sketching allows me to test how different elements like peacocks, paisleys, and floral bunches fit together before they ever hit your skin. It is also how I teach my students the art of balance—knowing when to leave negative space so the design pops rather than looking cluttered.
Practical Tips for a Great Stain
- Clove Steam: This is an old but effective trick. Heating cloves on a pan and taking steam on your mehendi-covered hands can help deepen the color significantly.
- Neat Fingertips: One of the most common complaints I hear is about henna looking messy around the nails. I focus on specific application techniques that keep the edges clean, even if you have long nails.
- Design Flow: When we plan your mehendi, we discuss how the design travels up your arms. I make sure the transitions between dense traditional motifs and lighter, shaded flowers are smooth.
Why Practice Matters
After 16 years, I still practice daily. Whether it is refining a tiered jhumka motif or perfecting a 3D shading effect for a bridal piece, this continuous refinement is what ensures your wedding day mehendi looks elegant and modern. If you want a design that is planned, thoughtful, and expertly executed, let's talk about what we can create for your ceremony.
Similar work from other experts
Browse through Curated picks from other experts on mytribe
The Art & The Artist: Behind My Mehendi Process
The Artistic Process: From Sketch to Stain
Watch Your Mehendi Design Come to Life
My Mehandi Design Process and Sketchbook
Behind the Scenes: My Mehndi Design Process
Behind the Scenes: My Mehendi Process
More from Bridal Mehendi by Saba Shaikh
More services by Saba Shaikh