The Composting Process: Turning Kitchen Waste into Black Gold
Turning your daily kitchen scraps into nutrient-rich compost is not rocket science. It is a simple rhythm of adding waste, maintaining moisture, and letting nature do its work.
This is my everyday composting routine, a simple four-step process. I add kitchen waste, sprinkle some of my Excelerator compost culture, add cocopeat in a 1:3 ratio to the waste, and finally cover it with a layer of brown leaves. It is that simple to fight climate change from your home.
A little effort each day is all it takes to send these nutritious kitchen scraps back to the soil. Here, I am mixing my daily waste with cocopeat before adding it to the composter. It is a small act that does good and feels good.
What makes your compost rich and black? It is all about the diversity of ingredients. I add everything from vegetable peels and eggshells to leftover bread and even non-vegetarian scraps to my compost pile, creating a balanced diet for the microbes.
After a long break due to home renovation, I am excited to restart my composting journey. The first step is always to place the filter fabric at the bottom of the EVA composter's inner shell and add a layer of bone-dry cocopeat to absorb moisture.
Composting is about giving back what you take from the soil. This video shows the simple act of adding daily kitchen waste, mixed with cocopeat as a carbon source, into the composter. This cycle of returning nutrients to the earth is fundamental to soil health.
People often ask where to start. As my friend Vani Murthy shows, it begins with simply collecting your kitchen scraps and adding them to a composter. It is a love story that gives you purpose and connects you to nature.
Here is an update on the composting progress in my EVA bin. The pile is getting warm and has a typical kitchen waste smell, which is a good sign that the decomposition process has started. The bin is hungry for more food, and I shall oblige.
After harvesting, it is important to check if your compost needs sieving. If it is well-decomposed with only a few larger pieces like eggshells, you can use it directly. Sieving is only necessary if you have large, semi-composted clumps.
Harvesting the Ebony composter is an easy and clean affair. The lightweight fabric bags are simple to lift and empty. After just three weeks, we harvested nice-smelling compost with a 60% reduction in volume and no maggots or leaks.
Curing is a vital step after the initial composting phase. Here, we are aerating the semi-finished compost from the Ebony and moistening it slightly before letting it mature. The breathable fabric containers make this curing process effortless.
About The Composting Process: From Kitchen to Black Gold
The secret to consistent, maggot-free compost isn't a complex machine. It is maintaining a simple daily rhythm. Aim for a balanced carbon-to-nitrogen ratio—think of it like your oggarane dabba (spice box) where everything has its place—by layering 1 part cocopeat to 3 parts kitchen waste. This simple habit keeps your bin healthy and ensures you get that dark, fluffy soil rather than a smelly mess.
From Scrap to Soil: A Step-by-Step Guide
Composting is a natural cycle, but like any good recipe, the inputs matter. If you are starting your journey, think of your composter as a living system that needs three things: air, moisture, and balance.
1. Preparation and Segregation (Kasa Vingadane) Everything starts at your kitchen counter. Segregation is your most important tool. Keep your dry waste (paper, cardboard) and wet waste (vegetable peels, fruit scraps) separate. Shredding your kitchen waste into smaller pieces before it hits the bin is a game changer—it increases the surface area for microbes, meaning your pile breaks down faster and occupies less space.
2. The Initial Setup Before you toss in your first batch of waste, ensure your bin is ready. If you are using an EVA or similar model, place your filter fabric at the bottom. Add a base layer of bone-dry cocopeat. This acts as a sponge, absorbing excess moisture and preventing leachate—the dark, often smelly liquid—from pooling at the bottom.
3. Daily Maintenance Follow the 1:3 rule: one part cocopeat (carbon) to three parts kitchen waste (nitrogen). If your compost smells, it is usually a sign that it is too wet or lacks enough carbon. Sprinkling a proprietary microbial culture, like my Excelerator, acts as a starter kit, introducing the right bacteria to kickstart decomposition, especially if you include trickier items like dairy or cooked scraps.
4. Harvesting and Curing When your bin is full, stop adding fresh waste and let it sit. The pile should heat up—a sign of active microbial life. Once the waste has broken down into a dark, earthy-smelling material, you are ready to harvest. One final tip: do not skip curing. Empty your compost into an open container, aerate it, and let it mature for a few weeks before feeding it to your plants. This ensures the chemical reactions have fully stabilized, so you are adding pure nourishment to your soil, not heat.
Similar work from other experts
Browse through Curated picks from other experts on mytribe


Start Your Home Composting Journey Today
Turn Your Kitchen Waste Into Black Gold: Home Composting Guide
 14
14

Organic Gardening and Composting Guides
 18
18
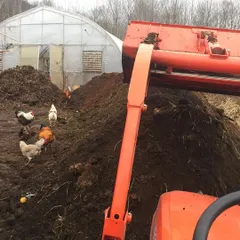
Composting with Chickens: Turn Kitchen Scraps into Garden Gold
Composting & Bio-Enzyme Workshops in Gurgaon
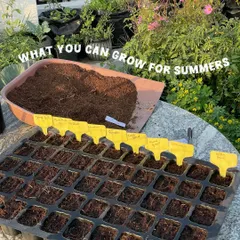
Getting Started: Soil, Seeds & Planting for Beginners
More from Composting Systems & Supplies by Savita Hiremath
More services by Savita Hiremath