Master the Professional Candle Making Process
Watch how professional candles come together. From wax melting to perfect wick centering, see the exact tools and techniques you need to create products that are ready to sell.
This is a comprehensive look at making a container candle. It covers pouring wax, centering the wick, using a heat gun for a smooth surface, and carefully placing decorative floral embeds with tweezers for a flawless finish.
Learn how to create the popular whipped or frosted top effect on your candles. This video shows me mixing fragrance oil into melted wax and then piping the whipped wax onto a jar candle, a technique that adds texture and a handmade touch.
This clip focuses on the final decorative steps of making a dessert-style candle. After piping the whipped wax topping, I carefully place a pre-made wax flower embed and trim the wick, completing the beautiful design.
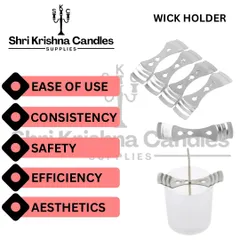
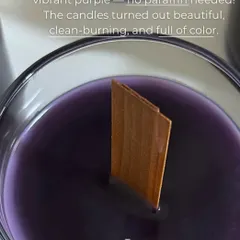
Here you can see how to properly set a wooden wick using a wick holder to keep it centered. I then add a delicate wax flower embed to the surface, showing how simple additions can elevate your candle design.
About The Candle Making Process
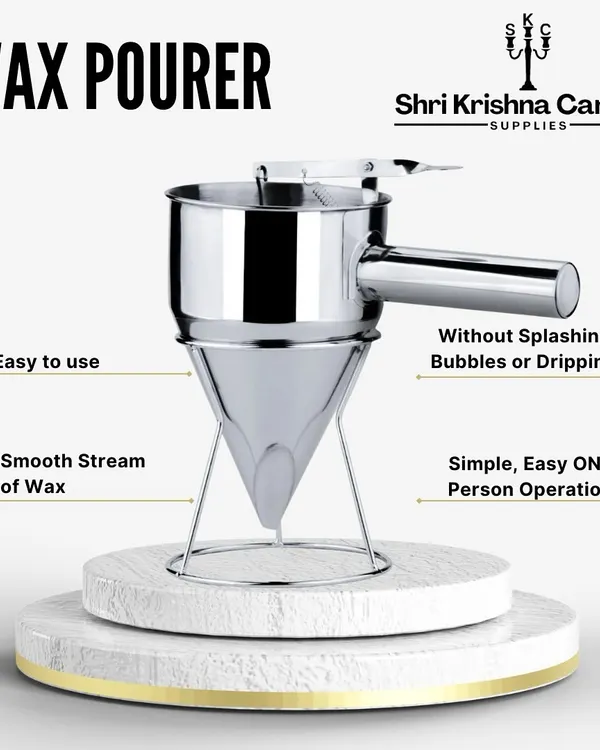
Getting that smooth, professional finish on a container candle isn't just about the wax. It is about precision at every stage. Whether you are using a heat gun to fix surface imperfections or a probe thermometer to ensure your fragrance oil binds perfectly, using the right gear turns a kitchen experiment into a consistent, sellable product. Take a look at these techniques and identify which tools will help you solve the common troubleshooting issues you have been facing.
Troubleshooting Your Candle Making
Candle making is a delicate craft and perfecting it takes patience. Seemingly small mistakes can cause candles to burn unevenly, throw poor scent, or even become safety hazards. Here is what I see new makers struggle with most:
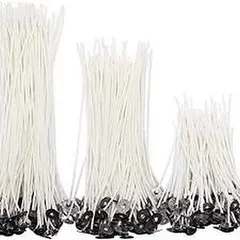
- The Wick Game: The wick is the heart of your candle. Never just buy the first one you see. Different wicks react differently based on your vessel size, wax type, and the amount of fragrance oil you use. Always experiment with your wicks before launching a product.
- Fragrance Oils: Remember that oils smell different in a bottle than they do when heated. The heat changes their character, often making them deeper. If you use essential oils, learn your flash points so you do not burn off your scent during the mixing stage.
- Vessel Safety: If you are using glass, thickness matters. It should be at least as thick as a standard wine glass, preferably more, to prevent cracking under heat. If you are pouring into concrete or jesmonite, always use a water-based sealer to stop 'seeping' or leaks that will ruin your hard work.
Why Quality Tools Matter
Consistency is the difference between a hobby and a business. A digital weighing scale ensures your ratios are identical every single time, preventing waste. An infrared thermometer takes the guesswork out of pouring temperatures, which is the secret to avoiding those dreaded sinkholes and uneven tops. If you are just starting out, prioritize a reliable heat gun and a sturdy stainless steel pouring pitcher—these two items alone will save you hours of frustration and wasted material.
Similar work from other experts
Browse through Curated picks from other experts on mytribe
Behind the Scenes: My Hand-Poured Candle Process
 5
5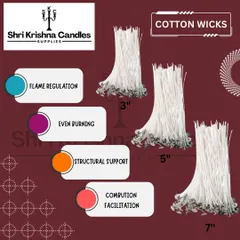
Essential Wicks and Tools for Professional Candle Making
Behind the Craft: How We Make Our Handmade Soy Candles
Behind the Scenes: How We Handcraft Your Candles
Start Your Own Candle Brand Without the Production Hassle
Behind the Scenes: Hand-Poured Soy Candles
More from DIY Crafting Tools & Equipment by Soap Material Hub
More services by Soap Material Hub