Behind the Scenes of My Mandala Art Process
Curious about how a blank wall becomes a detailed mandala? Here is a peek into my creative journey, from that first digital sketch to the final protective coat.
It all started with a pen and paper. This is a throwback to my early sketchbook drawings, where I first discovered the calming process of creating mandalas.
Here are 3 do's and don'ts to elevate your mandalas. Quick tips on layout, pencil marks, and using different pen sizes to add depth and contrast to your work.
Three things I always do when creating huge mandalas. I always start with a digital design, prepare the surface thoroughly, and give the process the time it deserves.
Want to achieve a perfect mandala grid? This video shares three essential tips: mark your center, ensure your angles are symmetrical, and use a light hand with the pencil.
Creating a mural for the first time? Here are some key things to remember, from surface preparation and design planning to gathering all your materials before you start.
Coffee and mandalas, what a perfect duo. A quick video of me working on a digital design on my tablet, a crucial first step in my planning process.
Pack a mandala with me. Here’s how I carefully roll and package my canvas artworks for safe shipping to their new homes, this one was on its way to Bangalore.
An intricate mandala filling a two page spread in my sketchbook. These early drawings were where I developed my style and passion for detailed patterns.
A geometric mandala design from my sketchbook. Exploring different symmetries and shapes on paper is how I come up with new ideas for my large scale murals.
An experimental piece from my sketchbook, where I used coffee to stain the paper and create a warm, vintage effect behind the ink mandala.
About My Process & Tips for Artists
Before I ever touch a wall, I create a digital mockup. This isn't just to see how it looks—it helps us agree on the symmetry, density, and flow of the design. Once that is finalized, I spend 4 to 7 days painting it entirely by hand, treating the wall like a slow, meditative process rather than just another project.
From Paper to Wall
My process always starts with a digital draft. By superimposing the design onto a photo of your wall, we can finalize the placement and palette before any paint hits the surface. Whether you want a monochrome look, a metallic gold finish, or a bold color burst, the mockup ensures we are on the same page.
The Execution
Once we start on-site, I follow a few non-negotiable steps to get that clean, symmetrical look:
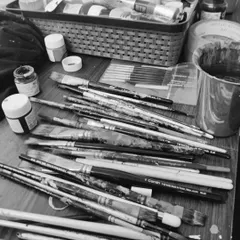
- Surface Prep: I always start by cleaning and priming the surface. If the base isn't smooth, the paint won't sit right.
- The Grid: Precision is everything. I mark the center and carefully map out the angles. I always use a light hand with the pencil so no marks remain under the final ink.
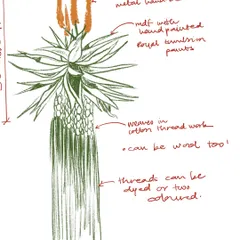
- Hand-Painting: I rarely use stencils. Freehand drawing gives the mandala its soul, and the slight imperfections are exactly what make it look human and organic.
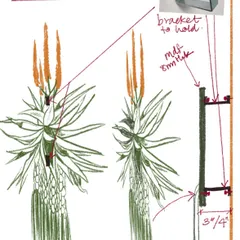
Protecting Your Art
Finally, every mural is finished with a clear matte or glossy varnish. This doesn't just make the colors pop—it makes the wall wipeable, which is essential for busy cafes, offices, or homes with kids and pets.
Tips for Fellow Artists
If you are starting your own mural journey, my biggest advice is to pace yourself. Rushing leads to mistakes you cannot undo. Pack your supplies thoroughly, double-check your measurements, and most importantly, enjoy the time you spend in the zone. It is about the process as much as the result.
Similar work from other experts
Browse through Curated picks from other experts on mytribe
The Artistic Process: From Sketch to Mural
Behind the scenes of my creative process
 7
7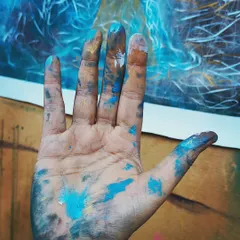
Behind the Mural: How We Plan & Paint
The Creative Journey: Behind the Scenes of my Wall Art
My Mandala Creative Process & Techniques
A Look Inside My Process: Art in the Making
Find the perfect mural for your space
Search by room type, art style, or design theme to see what fits your home.
More from Custom Murals & Commissioned Art by Disha Daga
More services by Disha Daga