My Process: From Powder to Paste
Ever wonder what creates that rich, deep-maroon stain? Here is a look at my daily ritual: mixing triple-sifted Sojat powder with essential oils to create fresh, chemical-free henna.
I started by making just a few cones for myself, and now, Alhamdulillah, I prepare large batches for so many of you. This video shows how I measure and mix the henna powder for bulk orders.
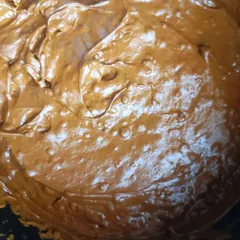
Unlocking the secret to a silky, deep-staining henna paste. It all starts in this bowl, where I carefully mix the ingredients and let the dye release.
A glimpse into my henna mixology for a marriage order. I use only the best quality henna powder and natural ingredients.
Preparing for bulk orders with the grace of Allah. Here you can see me mixing the henna paste and letting it sit for the dye to release, which is crucial for a dark stain.
After the henna paste has rested and the dye is fully released, it's time to fill the piping bags. This is a key step before filling the individual cones.
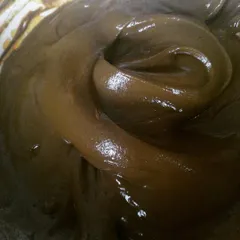
Using an electric mixer to get the henna paste to the perfect lump-free, silky consistency. This ensures a smooth flow from the cone.
Let's make henna paste together. I start with my organic powder and sugar, mix it, and then cover it to let the natural dye release.
The satisfying swirl of the mehendi mixer, ensuring every bit of the paste is perfectly smooth and blended.
As a small business owner, I invest in all my own supplies. Now that I have everything I need, Inshallah, the customers will come.
Showing the high-quality cellophane sheets I use to make my empty cone rolls. These are also available for purchase if you want to roll your own cones.
About My Process: From Powder to Paste
I refuse to use market-bought cones because most contain preservatives and chemicals I wouldn't dream of putting on my own skin. For me, the process is non-negotiable: I triple-sift my henna powder, mix it with pure essential oils like lavender or clove, and let it rest for the perfect dye release. This is exactly how I guarantee that signature mahogany stain that deepens over 48 hours without any skin irritation.
Why I Make My Own Henna
Most mass-produced cones are filled with PPD and other harsh dyes to get a fast, fake color. That is not me. My entire process is built around imaan (faith) and quality. When you order from me, you are getting paste that is mixed, filled, and sealed right here in my Bengaluru studio.
The Science of the Stain
It is not just about powder and water. Getting that deep, long-lasting stain requires two things: fresh ingredients and patience.
- The Sift: I sift my henna powder multiple times. A smooth, lump-free paste is the only way to get those intricate, crisp lines for bridal designs.
- Dye Release: I don't rush the process. After mixing the powder with sugar and essential oils, I cover the paste and let it rest. This is when the henna actually releases its dye. Without this wait, you just get a light, fleeting color.
- Wazu-Friendly: Because many of my clients need to perform Wazu, I ensure my organic formula stains the keratin layer of the skin effectively while remaining completely safe.
Storage & Care
My henna is fresh, not shelf-stable with preservatives.
- Freeze it: Since there are no chemicals, my cones have a shelf life of 3-4 months when frozen. If you aren't using them immediately, put them in the freezer as soon as they arrive.
- Thawing: When you are ready to use them, let the cone thaw at room temperature for 15-20 minutes. It will be just as fresh as the day I mixed it.
Similar work from other experts
Browse through Curated picks from other experts on mytribe
From Powder to Paste: My Handmade Process
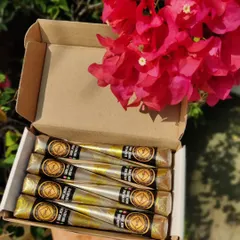
Handmade Organic Henna Cones
 45
45
My Process & Organic Henna Cones
My Organic Henna Process & Cones
The Art of My Handmade Organic Henna
Handmade Organic Henna Cones: Behind the Scenes
Explore more of my work
Search for services or products to see how I can help with your event.
More from Handmade Mehendi & Beauty Products by Aayat Mehendi Art
More services by Aayat Mehendi Art