Learn Mehndi Art: Start Your Journey from Basics
Every great design starts with perfect lines. Join me in my studio as we start from the very basics—mixing your own henna paste, mastering cone control, and creating traditional motifs.
The secret to a beautiful, dark mehndi stain is in the paste. I start my course by teaching students how to prepare their own DIY henna paste using natural ingredients. Here, you can see a live demonstration of the mixing process during one of our classes.
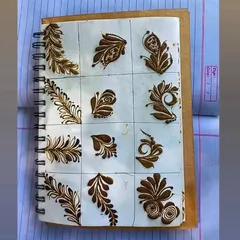
Here is a demo of me practicing different Arabic mehndi designs on paper. These patterns, known for their bold lines and flowing floral vines, are a key part of the beginner's module. We practice these extensively to build cone control and design sense.
Practice is everything when you are starting out. This video shows my students in the early stages of their training, diligently practicing basic shapes like paisleys and simple lines. Mastering these elements is the first step towards creating complex designs.
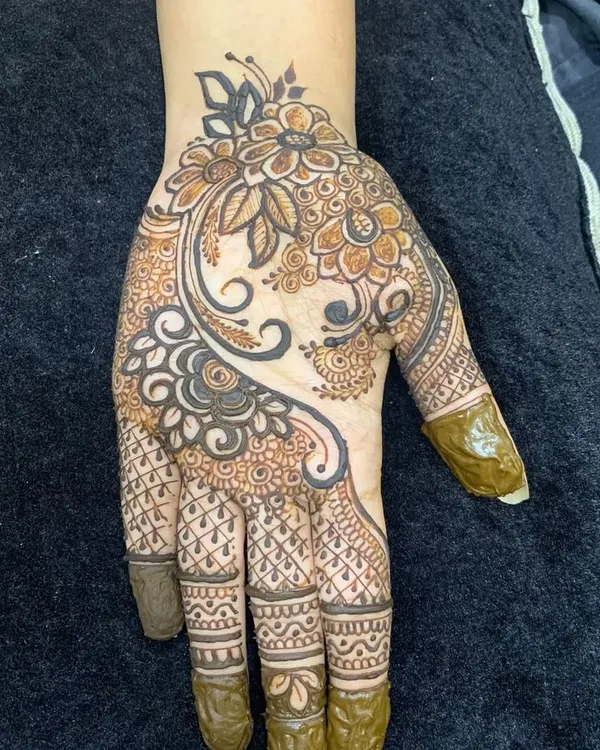
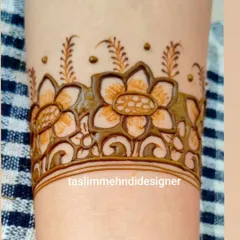
This is what a typical day in my class looks like. From practicing elephant motifs and paisley fillers to a group of happy students showing off their completed practice sheets, it's all about learning together and celebrating progress at every step.
Here you can see my students focused on their practice sheets, working on various design elements. We use these sheets to practice everything from small motifs to full hand layouts before moving on to skin application.
About The Foundation: Mastering the Basics
Don't worry about being a total beginner—everyone starts with a blank sketchbook. In my classes, we actually sit on the floor, mix our own natural henna paste from scratch, and practice cone pressure until your lines flow perfectly. You don't need fancy tools to start, just dedication and a willingness to learn the right technique from the ground up.
I started teaching because I believe mehndi is a skill that anyone can learn if they have the right guidance. My 'Mastering the Basics' course is specifically designed for those who want to build a strong foundation before jumping into complex bridal work. We avoid shortcuts; instead, we focus on the manual work that makes an artist truly skilled.
What we cover in class:
- Paste Preparation: You will learn how to make your own DIY henna paste using natural ingredients, so you never have to rely on store-bought chemical cones.
- Control & Flow: We dedicate hours to cone control—rolling, sealing, and managing pressure—to ensure your lines are crisp and consistent.
- Design Fundamentals: We drill the basics, from simple lines and borders to filling patterns, paisleys, and mandalas.
We conduct these classes at my studio in Ghatkopar West (Amrut Nagar) and near Chembur. The atmosphere is always collaborative, with plenty of hands-on practice. Whether you are a college student or a working professional, I offer flexible batches, including evening sessions, to suit your schedule. By the end of this module, you won't just know how to draw; you'll understand the art of henna application properly.
Similar work from other experts
Browse through Curated picks from other experts on mytribe
Master Professional Mehendi Design from Scratch
 8
8Mastering the Fundamentals of Mehendi Artistry

Building Your Foundation in Mehndi Art
Mastering the Basics: From Cone to Creation
Beginner Mehndi Classes: Learn Mehndi Design Basics

Learn Professional Henna Artistry in Mumbai
More from Mehndi Training and Certification Courses by Priya Naik
More services by Priya Naik