Our Installation Process: How We Bring Sound to Your Home
I do not just deliver equipment; I integrate it. See how I handle everything from the first unboxing to that final, invisible flush mount in your ceiling or wall.
This video shows my complete process for an in-wall speaker. I unbox the DALI Phantom speaker, measure and cut the panel, install the unit securely, and finish with the magnetic grille. This step-by-step approach guarantees a perfect, integrated result every time.
Precision is key when installing in-ceiling speakers. Here, I am carefully securing a Bose speaker into the ceiling cutout. This ensures it's not only stable but also sits perfectly flush, making it virtually invisible once the grille is on.
The process starts with quality products. Here, I am unboxing a Klipsch PRO-16RC in-ceiling speaker. You can see the included template which I use to mark the exact cutout size, ensuring a snug and secure fit in your ceiling.
This is the unboxing of a high-performance Klipsch THX-504 in-wall speaker. I always inspect the equipment thoroughly before installation to ensure every component, from the drivers to the internal wiring, is in perfect condition for your home cinema.
About The Installation Process: From Box to Clean Finish
Getting the cutouts right is where most installations either succeed or fail, and I take this part personally. Whether it is a gypsum ceiling or a wooden panel, I use the exact manufacturer templates to mark the spot, ensuring the speaker sits perfectly flush with zero gaps. Once it is in, I finish it with a paintable magnetic grille that completely vanishes into your wall, leaving no rough edges behind.
From Unboxing to Audio Performance
When I start a project, whether it is in Delhi, Gurgaon, or Patna, I treat your home like my own. 'Kholo bhaiya' is not just a phrase; it is my standard. I believe in complete transparency, which is why I prefer to unpack the gear in front of you. You will see the Klipsch or Bose drivers, the build quality, and the hardware before anything goes into your wall.
No Jungle of Wires
One of the biggest complaints I hear is about messy, dangling cables. My process focuses on hiding the tech completely. I use high-grade 16AWG Oxygen-Free Copper wiring, fishing it through your false ceilings and walls so you never see a cable again. Everything is channeled, tagged, and connected to the central amplifier or network receiver.
Precision Installation
- The Cutout: I measure twice and cut once. Using dog-leg clamps, I ensure the speaker is locked tight against your ceiling or wallboard.
- The Finish: After installation, the magnetic grilles are fitted. These are paintable, so if you decide to change your wall color later, the speakers will simply blend into the new shade.
- The Calibration: This is where the magic happens. I configure your app control (HEOS or MusicCast), balance the bass and treble, and perform room-specific acoustic tuning. We do not just finish when the sound comes on; we finish when the sound is right for your room.
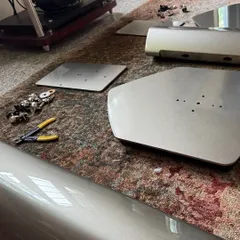
Site Cleanup
I hate leaving a mess as much as you do. Once the dust from the drilling and cutting is settled, we clear out the gypsum debris and packaging, so the only thing left for you to notice is the music.
Similar work from other experts
Browse through Curated picks from other experts on mytribe
 11
11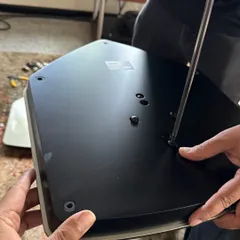
Our Craft: The Installation Journey
Home Theater Installation & Setup Process


Professional AV Installation & Technical Setup Services
 32
32

Invisible Audio: Seamless Home Integration

From Raw Room to Private Cinema: The Build Process
Our Smart Home Installation Process
More from Whole-Home & Multi-Room Audio Installation by Delight Sound Solutions
More services by Delight Sound Solutions