How I Create Hyper-Realistic Pencil Sketches
From grid lines to the final shading, watch how every portrait comes to life. See the patience and technique that goes into every piece.
This is a montage of my realistic artwork journey. It shows me at my drawing table and flashes through several of my completed portraits, giving a quick glimpse into the world of my art.
A time-lapse showing the creation of a delicate drawing of a girl holding a flower. I use a white pencil on a dark background to create highlights and bring the fragile petals to life.
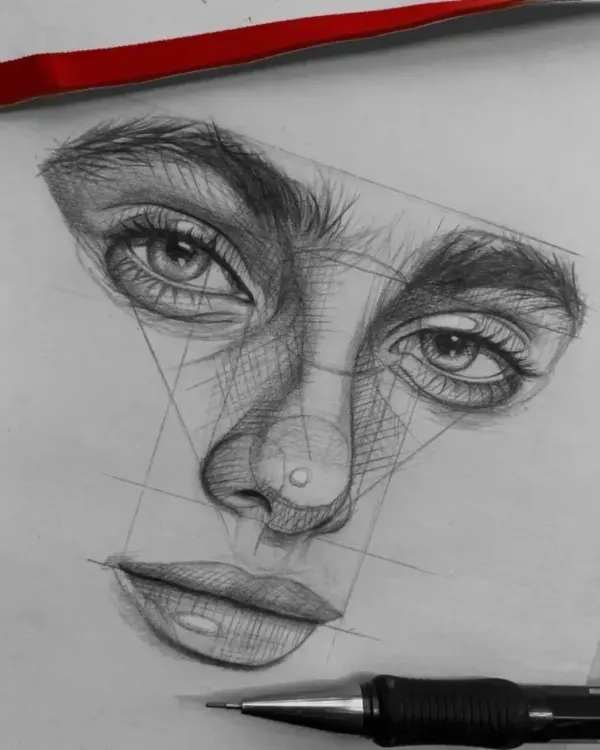
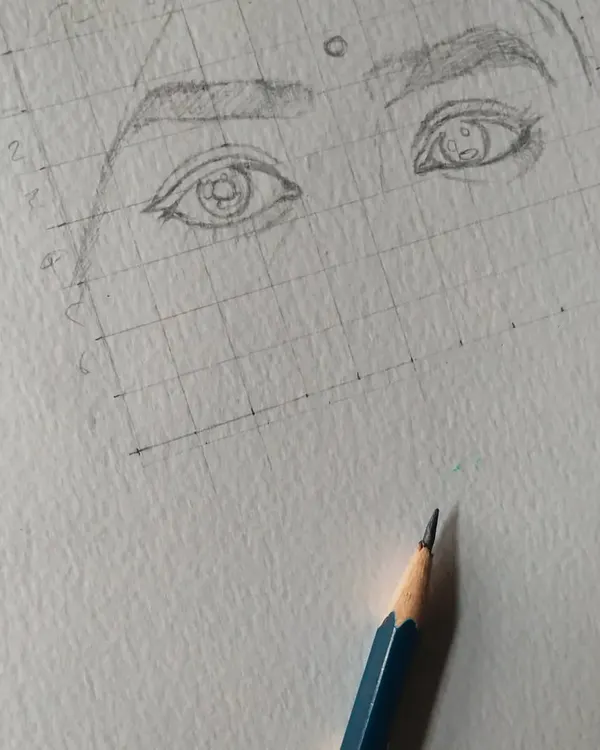
A close-up video demonstrating how I draw a realistic eye and eyebrow. I use different pencil grades and a blending stump to create smooth gradients and fine, hair-like strokes for the eyebrow.
This video shows my technique for creating a realistic ribbed texture on a sweater. I use a sharp pencil to draw the lines and then blend the shadows with a brush to give the fabric depth and form.
A process video showing the development of a male portrait. You can see me working on the hair, mustache, and beard, carefully adding layers to create realistic texture and shading.
Watch as I demonstrate how to create the texture of clothing using charcoal. This process involves layering, blending, and lifting the charcoal to create the look of knitted fabric.
This is a detailed tutorial on drawing a realistic eye. I show how to use a brush for soft blending, a craft knife for creating sharp highlights on the pencil tip, and careful strokes for the eyebrow.
About Behind the Pencil: The Drawing Process
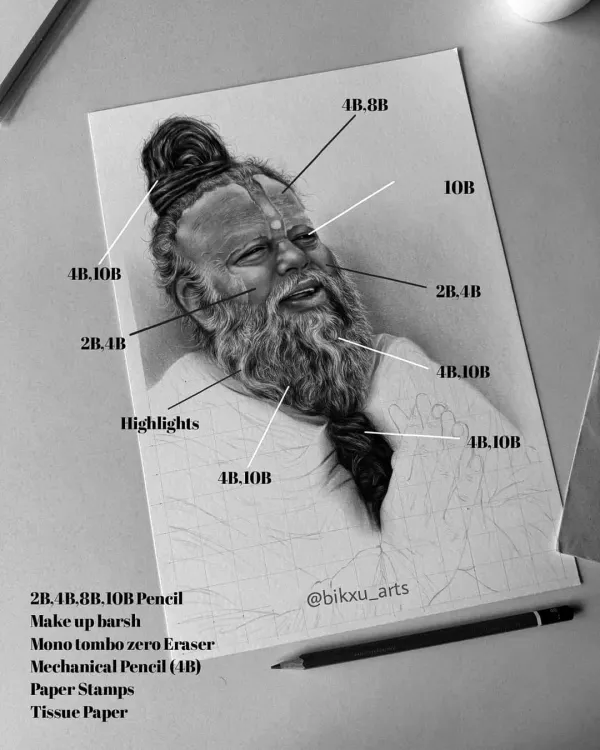
Many people ask how I get facial proportions perfect every single time. The secret is the grid method. I meticulously map out the dimensions of your photograph onto the paper before a single drop of graphite touches the surface. This ensures 100% accuracy for every eye, nose, and smile, no matter how complex the expression is.
The Anatomy of a Portrait
At my studio, my process starts with understanding the light and shadow in your photo. For graphite work, I use high-grade 250 GSM paper and a mix of graphite grades, ranging from HB to 10B. When you commission a piece, I do not just copy the lines; I look for the depth.
My Material Toolkit
- Graphite & Charcoal: I use graphite for smooth skin tones and charcoal powder for those deep, rich blacks in clothing or hair.
- Precision Tools: My Mono Zero eraser is essential. It helps me pull out those tiny highlights, like the glint in an eye or fine, stray hairs, which is what gives the art its realism.
- Protection: Once the drawing is complete, I seal the work with a matte fixative spray. This prevents smudging, ensuring your portrait stays safe for years.
Why Process Matters
Whether it is an A4 solo sketch or an A2 family group portrait, every project undergoes the same rigorous layering. You might see me using a blending stump to soften gradients or a craft knife to sharpen my pencil tips for detail work. It is a long, patient road to get to the final fixative spray, but that is what gives my art the longevity it needs. If you are curious about learning these techniques yourself, I also host online workshops where I break down this exact workflow, step-by-step.
Similar work from other experts
Browse through Curated picks from other experts on mytribe
 27
27The Artistic Process: How I Create Realistic Portraits
The Process: How I Create Handmade Portraits
 9
9
Behind the Scenes: My Pencil Sketching Process
Behind the Scenes: How Your Custom Portrait is Made
Behind the Scenes: The Making of Hyper-Realistic Portraits
 35
35Behind the Scenes: How I Create Hand-Drawn Portraits
More from Hand-Drawn Realistic Portraits by Sagar Viradiya
More services by Sagar Viradiya