The Art of Hyper-Realistic Portrait Drawing
Witness the transformation of a blank page into a detailed portrait. See how I use graphite and charcoal to capture expressions one stroke at a time.
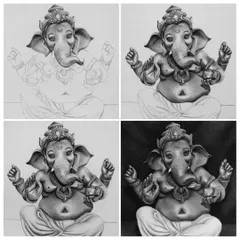
This video shows the first steps of a portrait, starting with the grid method and blocking in the darkest areas of the eyes and mouth.
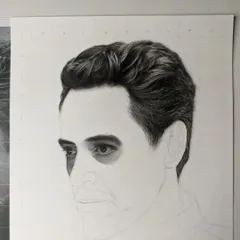
A work in progress. You can see how the portrait slowly emerges from the paper, with the face and beard almost complete.
Another angle of the drawing in progress, showing the grid lines I use to maintain accurate proportions.
The final drawing of this portrait, showcasing the intricate details of the hair and the soft texture of the saree.
A progress shot where I have started shading the hair and back. You can see the underlying sketch which guides the final rendering.
The initial outline for a complex pose. Planning the composition is a critical first step before any shading begins.
This timelapse shows the process of shading the back and hair, focusing on light and shadow to create form.
Here I am working on the fine details of the saree and the delicate straps of the blouse.
A vertical shot of the work in progress, showing how I build up the dark tones of the hair against the lighter skin.
The first progress video of this piece, showing how I establish the darkest areas first to create contrast.
About The Art of Hyperrealism: From Outline to Masterpiece
Every portrait I create takes me 40 to 45 hours of steady, focused work. I start with simple grid lines to ensure proportions are dead on, then slowly build layers with graphite and charcoal pencils. That patience is exactly what I teach in my workshops—it is not about quick results, but understanding light, shadow, and the discipline required to render skin texture and hair one stroke at a time.
The Process: From Grid to Life
It begins with the grid method. Many beginners skip this, but it is the secret to accurate proportions. I map out the face, noting where the eyes sit and the exact tilt of the nose. Once the outline is set, I start shading.
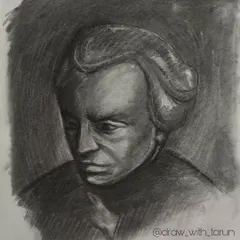
The Medium: Graphite and Charcoal
I stick to graphite and charcoal because they allow for incredible control. Graphite gives me those smooth, soft gradients on skin, while charcoal helps create deep, punchy blacks that make eyes and hair pop. Blending is key—I use soft brushes to transition tones, avoiding the harsh lines that make sketches look flat.
Learn the Technique
If you join my 1-month live workshop, we do not just copy pictures. We learn how to look. We break down the 'how' of drawing realistic hair strands, the wet look of eyes, and how to handle textures without overworking them. It is interactive, conducted on Zoom, and designed for anyone who wants to move beyond basic sketching.
What we cover:
- Light and Shadow Theory: Building volume on a flat surface.
- Feature Construction: Focusing on eyes, noses, and lips.
- Texture Mastery: Capturing realistic skin and hair.
- Tools: Using paper stumps, makeup brushes, and mono erasers.
Whether you want a custom portrait or want to learn the craft yourself, my approach remains the same: steady work leads to real results.
Similar work from other experts
Browse through Curated picks from other experts on mytribe
Hyperrealistic Pencil and Charcoal Portraits
Learn Realistic Pencil Portrait Drawing (Step-by-Step)
 27
27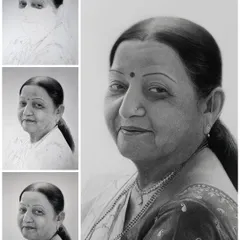
Step-by-Step Portrait Course
 14
14
Realistic Pencil & Charcoal Art Showcase
 6
6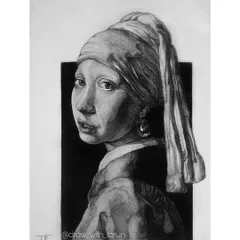
Handmade Portrait Sketches and Techniques
The Artistic Process: From Sketch to Finish
Looking for something specific?
Search for the type of art or class you are interested in.
More from Online Drawing Workshops by Vikash Tanti
More services by Vikash Tanti