Mehendi Art: Behind the Process
See exactly how I bring a design to life. From the first drop of henna on your palm to the final intricate details, these videos break down the pressure, flow, and precision behind my art.
Watch me outline a delicate floral and jhumki design. Getting the initial sketch right is the most important step, and I give personal attention to help you master this.
Here I am filling in the jhumki (bell) motifs from the previous video. You'll learn how to use shading to make them look rounded and three-dimensional.
A close-up of creating a bold, shaded mandala on the palm. This video shows how to apply even pressure for smooth, consistent fills.
This video shows the two-tone effect of fresh henna paste and partially dried paste. I teach how to work with henna at different stages of drying.
Starting a design from the very center of the palm. This video shows the first dot and the beginning of a heart-shaped motif.
Creating a small, detailed bracelet design on the wrist. Even small designs require a lot of precision.
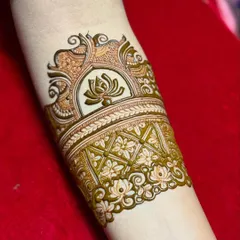
A beautiful floral cuff design in progress. Watch how I build up layers of petals and leaves to create a 3D effect.
This video shows the creation of a modern arm band with overlapping circular patterns.
Filling in a square lotus motif. This is a great exercise for practicing symmetry and control within a defined space.
A beautiful design on the back of the hand, showing how to create a delicate net pattern on the fingers.
About From Cone to Creation: The Process
The secret to a perfect stain is not just the henna mix, it is about how you hold the cone. When you watch these clips, notice the light pressure I use for those thin, crisp borders versus the consistent flow required for the darker, filled areas. It is all about hand stability and understanding how the henna settles on the skin at different stages of drying.
Many people think mehendi is just about the final design, but for me, it is a conversation between the cone and the skin. Whether I am drawing a delicate jhumki motif or a complex bridal jaal, I focus on the flow. In these videos, you will see how I map out the hand before starting. I usually start from the center and work my way out, ensuring the composition is balanced and fits the shape of the hand perfectly.
I use 100% natural henna. You will notice in my process that I do not rush. The dark stain you see in my work comes from allowing the paste to dry slowly and naturally, without any chemicals. If you are learning, pay attention to the grip in these videos. A tight grip often leads to shaky lines. I teach my students to hold the cone like a pen, letting the weight of the paste do the work rather than forcing it out.
If you have an upcoming event in Delhi, Mumbai, or anywhere else, I bring this same precision to your bridal or party mehendi. It is not just about the final look; it is about the experience of getting it done peacefully and enjoying the beautiful, deep colour that develops. If you have a design in mind or want to learn the craft yourself, let's talk.
Similar work from other experts
Browse through Curated picks from other experts on mytribe
Behind the Scenes: My Mehendi Artistry Process
Behind the Cone: The Art in Motion
Mehendi Artistry in Motion
The Art of Application: My Freehand Mehndi Process
Behind the scenes: My mehendi process and practice
The Art of Precision: My Mehndi Technique
More from Mehandi Art Classes by Atul Nayak
More services by Atul Nayak