3D Shading and Dimensional Mehndi Designs
Depth and dimension bring henna art to life. Here is how I use layering and shading techniques to make patterns like lotus motifs and jhumkis look like they are lifted right off the skin.
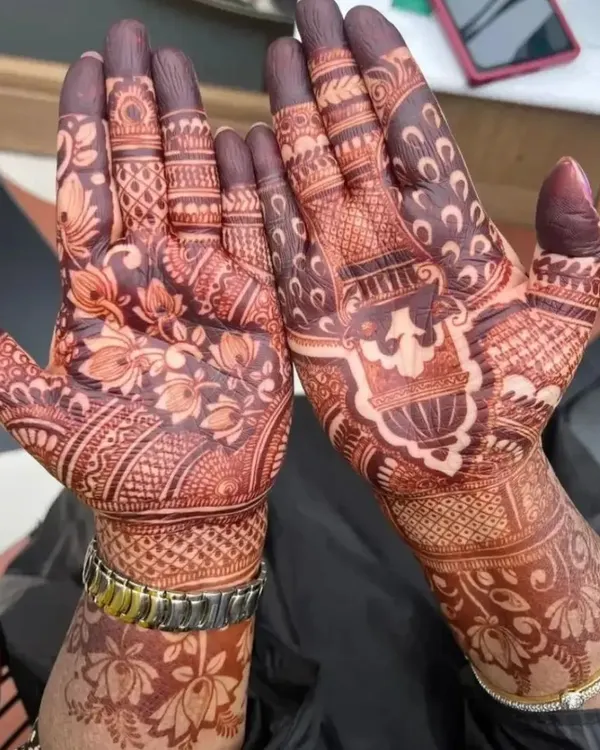
This is a finished cuff design showcasing 3D lotus flowers. The technique involves careful layering of henna paste, which I demonstrate in detail in my advanced course.
This arm design features bold, shaded elements that create a high-contrast, almost 'negative space' look. You will learn how to use shading to create drama and impact in your work.
This is the outline for the lotus cuff design. A perfect outline is the essential first step before applying the 3D and shaded fills.
Here you can see the design partially filled. I teach how to build up layers of shading and bold fills to create a rich, textured look.
The design is now almost complete, showing the interplay between the filled background and the lighter floral motifs. This contrast is key to the 3D effect.
Another example of a beautiful lotus cuff outline. We practice these foundational shapes until they become second nature.
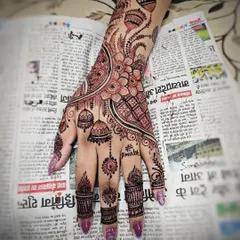
This finished arm piece demonstrates a variety of shading techniques. I teach how to create different textures, from fine lines to smooth gradients, all with a single henna cone.
This is the starting point, a simple floral mandala outline. From this, we build up the entire complex design seen in the previous image.
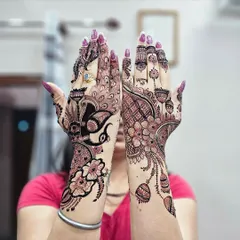
This armband shows a 3D lotus band combined with a geometric net pattern. The raised effect of the flowers against the flat net creates a beautiful textural contrast.
The outline for the 3D lotus band. I teach my students how to draw these outlines perfectly so the final filled design is clean and symmetrical.
About The Art of Shading & 3D Effects
It is all about the outline. Before I even pick up the cone for the fill, the structure needs to be spot-on. I focus on creating a sharp, clean border first, which acts as the frame for the shading. When you see those lotus motifs or jhumkis look like they are lifted off the skin, it is because I layer the henna thickness strategically. It is not just about drawing; it is about knowing where to add that extra pressure to create the gradient that makes the design look raised.
Creating 3D effects in mehndi is a balancing act of pressure and patience. Unlike standard flat designs, 3D henna art requires a deeper understanding of how the paste sits on the skin. I use 100% natural, herbal henna, which is essential for this technique. The paste needs to be mixed to a specific, stringy consistency so it does not smudge when I am layering it for that 'raised' look.
The Technique
The process starts with a precise outline, often using a finer line to establish the boundary. Once that is set, I build the depth using varying thicknesses of paste. This 'dual-pressure' shading allows me to create shadows that give elements like mandalas and floral vines a physical presence.
Why 3D Works for Weddings
For bridal work, these techniques are game-changers. Photos show depth much better than flat, two-dimensional line work. Whether I am applying a full cuff on your arm or detailed jhumkis, the result is a design that stands out in your wedding photography.
Safety and Color
I never use chemical boosters to get that dark stain. My henna is all-natural, which means you get a rich, deep color without risking skin reactions. This is crucial for bridal and festive events where you want your hands to look perfect for days. Whether you are in Delhi or elsewhere, I bring this same technical rigour to every event. If you are interested in learning these shading methods yourself, I also cover these exact steps in my Advanced Bridal Masterclass.
Similar work from other experts
Browse through Curated picks from other experts on mytribe
Mehendi Technique Showcase: Florals, Shading & Fills
My Mehandi Artistry: Techniques and Details
Elegant Floral & 3D Mehandi Designs
 7
7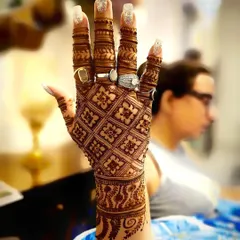
Full Hand & Bridal Style Mehndi
The Art of Mehandi: Process & Stain
The Art of Henna: My Techniques & Design Details
Looking for something else?
Search for specific mehandi styles or service types.
More from Mehndi Art Classes by Abhishek Kumar
More services by Abhishek Kumar